Dev CLI npx jamsocket dev
Use Jamsocket’s Dev CLI for faster local development. The Dev CLI
- automatically watches and rebuilds session backend docker images as you develop
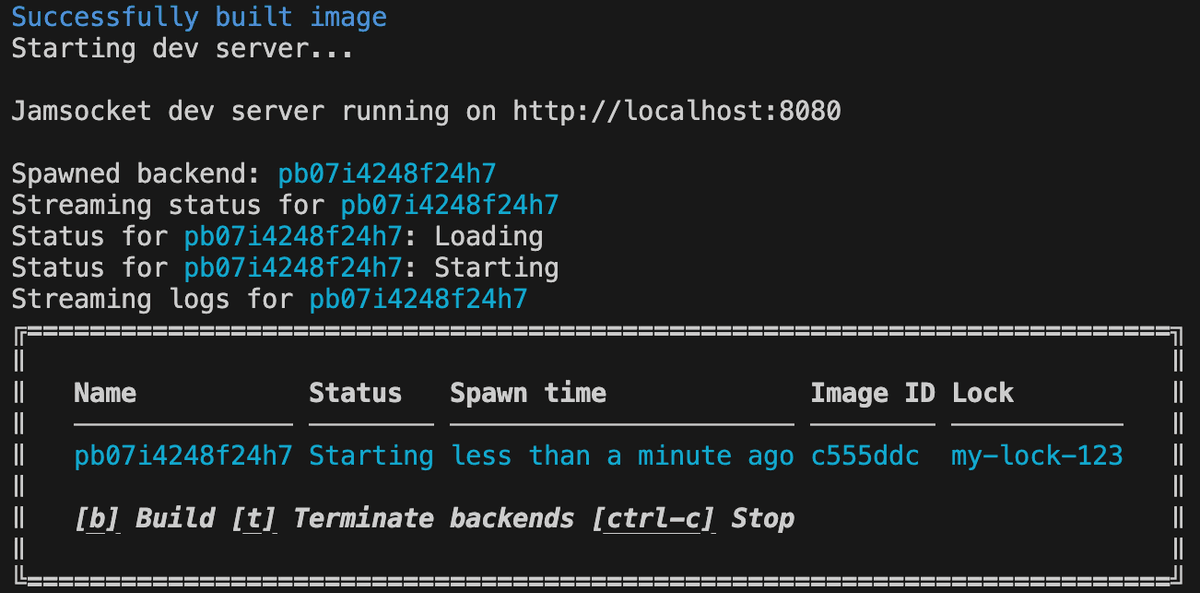
- runs a dev server that emulates Jamsocket’s spawn and status APIs
- streams statuses and logs from your session backend to the terminal
Running the Dev CLI
Running the Dev CLI is as easy as running npx jamsocket dev with the flag -f that specifies the Dockerfile that should be built. In most instances, you’ll also want to supply the -w flag that watches a file or directory to automatically rebuild your code on save.
npx jamsocket dev -f ./Dockerfile -w .Available flags:
-c, --context=<value> Path to the build context for the Dockerfile (defaults to current working directory)
-f, --dockerfile=<value> Path to the session backend’s Dockerfile
-i, --[no-]interactive Enables/Disables TTY iteractivity. (Defaults to true)
-p, --port=<value> The port to run the dev server on. (Defaults to 8080)
-w, --watch=<value>... A file or directory to watch for changes
--[no-]style-log-output Styles log output from session backends for better readability. (Defaults to true)
Use npx jamsocket dev --help for more info.
Optional: Create a jamsocket.config.json file
Optionally use a jamsocket.config.json to configure your Dev CLI instead of passing flags.
If you supply configuration instructions via flags, it will override or take the place of the jamsocket.config.json.
Create a jamsocket.config.json file in the directory where you run the dev command. Provide the following parameters:
dockerfile- specify the path to the Dockerfile that buids your session backend code.dockerOptions- an object that contains extra options for Docker (optional)path- optionally specify the path to the docker build context (defaults to the current working directory)
watch- optionally specify array of paths to watch for changes and automatically build your session backend code. If a watch array isn’t specified, the Dev CLI will not rebuild on changes.port- optionally specify port to run the dev server on (defaults to 8080)
For example:
{
  "dockerfile": "./src/session-backend/Dockerfile",
  "dockerOptions": { "path": "./src/session-backend" }, // optional
  "watch": ["./src/session-backend"], // optional
  "port": 8888 // optional, defaults to 8080
}
Example
Given a Dockerfile that looks like this:
FROM node:18
COPY . .
RUN npm install
CMD ["node", "main.js"]
And a config that looks like this:
{
  "dockerfile": "./src/session-backend/Dockerfile",
  "watch": ["./src/session-backend"],
  "port": 8080
}
Running npx jamsocket dev will start a Jamsocket dev server at localhost:8080. The Dockerfile (at src/session-backend/Dockerfile) will be built into a local Docker image.
Then, when you spawn a session backend with a request like so:
curl -X POST http://localhost:8888/v2/service/my-account/my-service/connectYou’ll get back a URL that will look like http://localhost:9090/tYVHfS4PKgufdhwGCnn6LLfAaCo_iAHitbw4Bg8ETjA/. Requests sent to this URL will be routed to your session backend. (You can see an example Dockerfile and NodeJS server in the Quickstart.)
my-account and my-service in the spawn endpoint with any dummy value. They are ignored in development.docker system prune -a.When a session backend starts, you should see it listed in the Dev CLI like so:
