Bring your own storage (BYOS)
Y-Sweet allows you to persist your document data to your own AWS S3 bucket. This tutorial will walk you through opting in to Y-Sweet’s BYOS (bring your own storage) feature.
Opting for BYOS
When you’re creating a Y-Sweet service in the Jamsocket Dashboard, you can opt into BYOS by selecting “Add S3 Integration” and providing the information needed to connect to your S3 bucket.
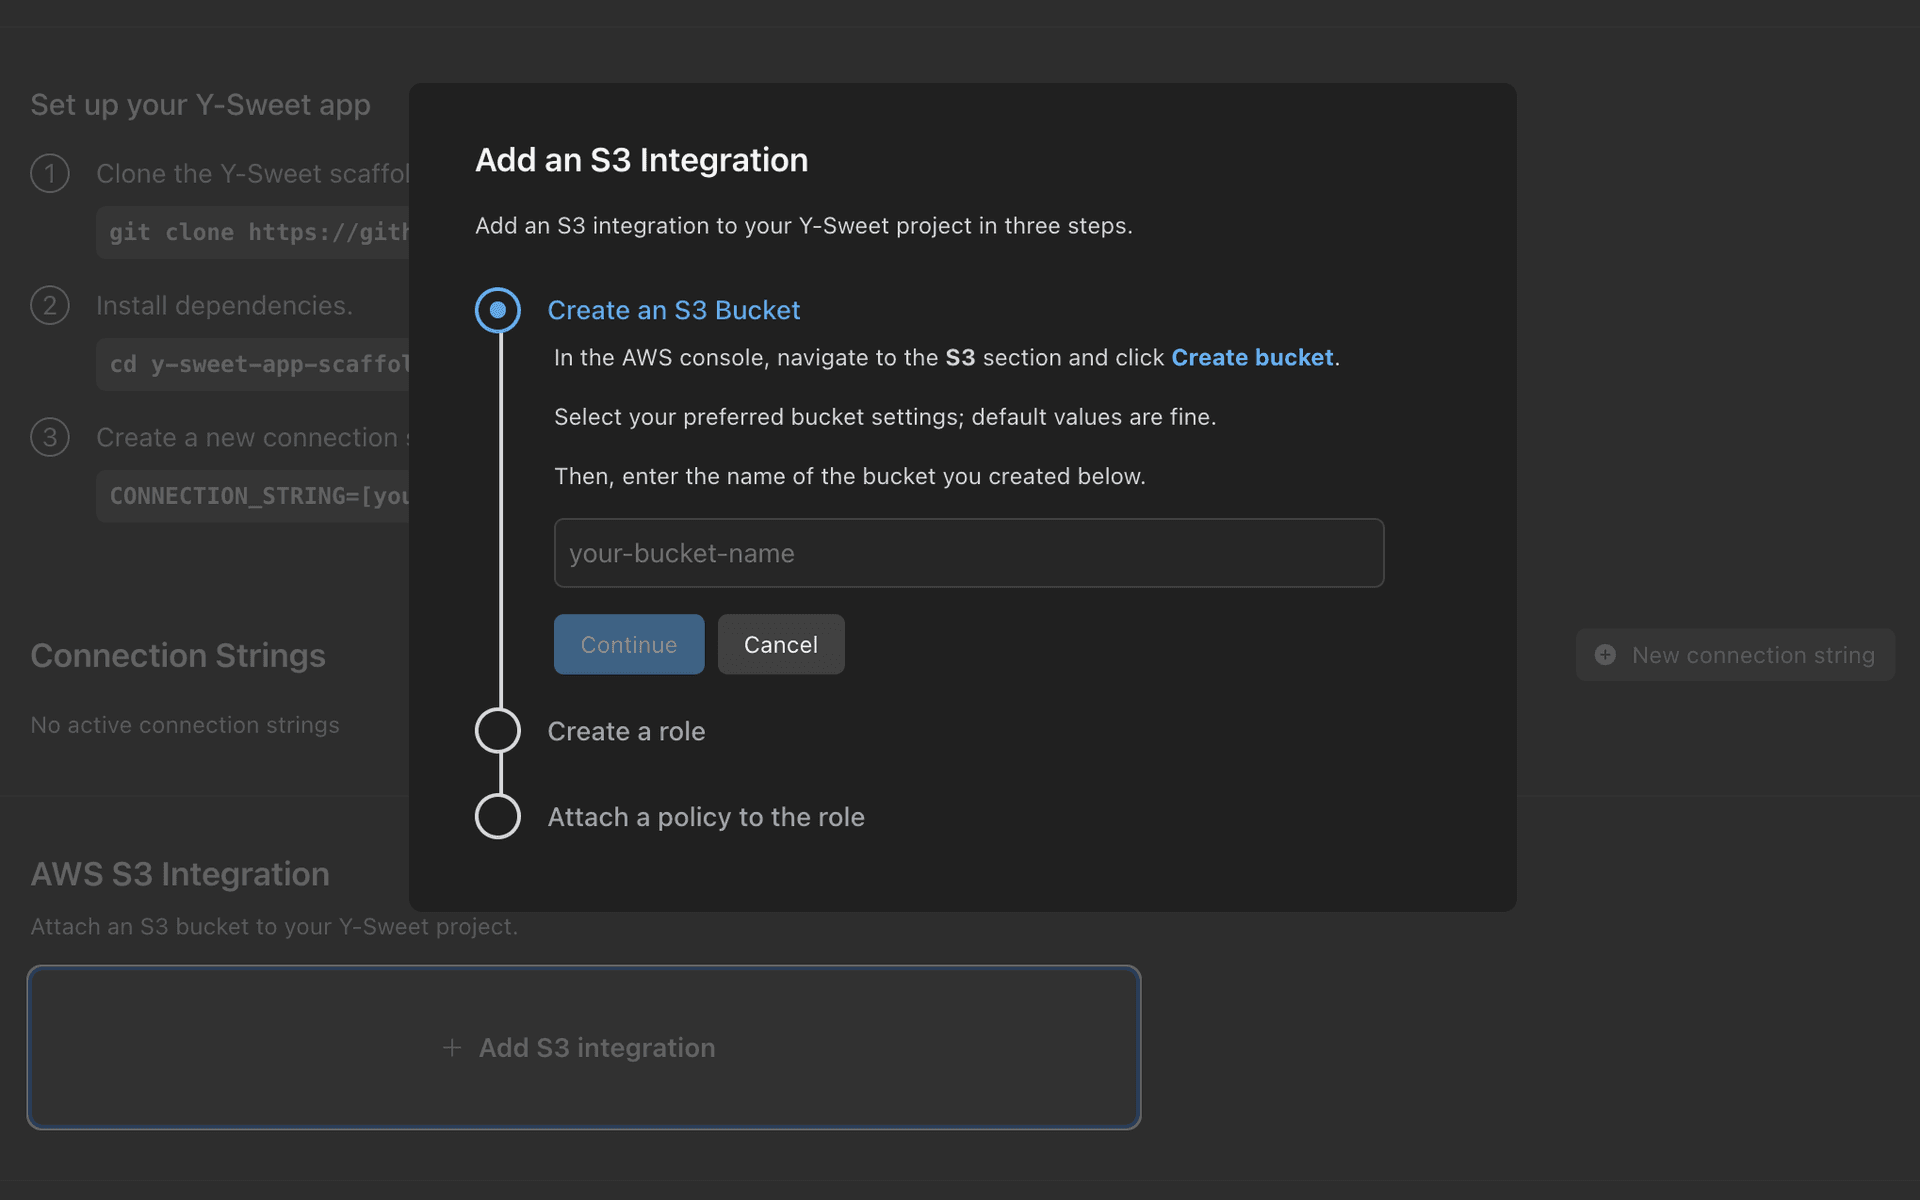
Connecting to your S3 Bucket
Create an S3 Bucket
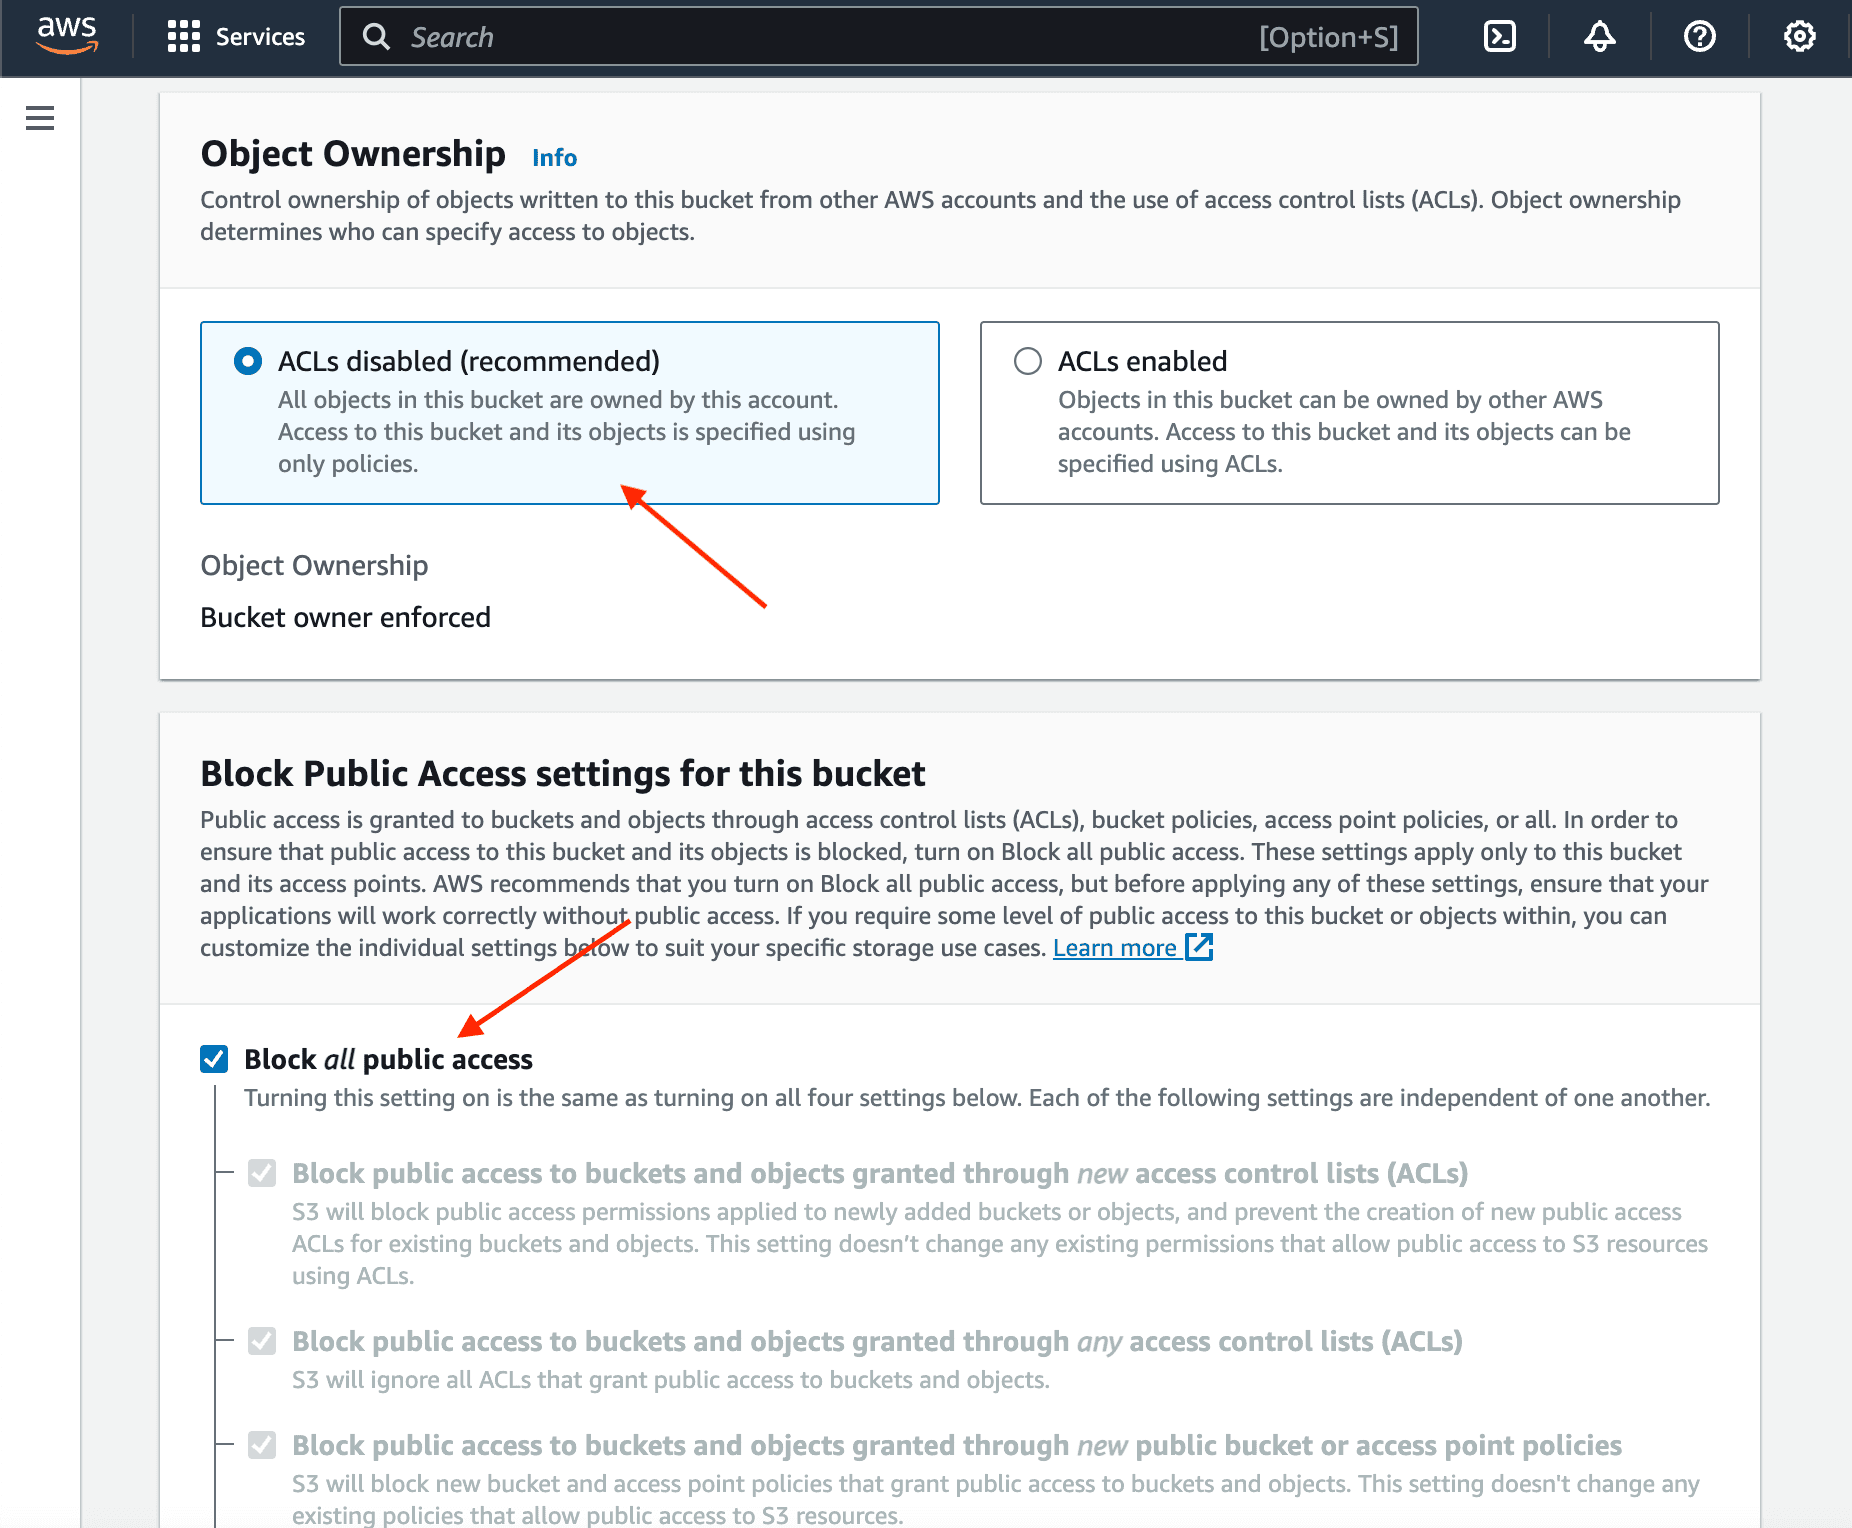
In the AWS Console, navigate to the S3 Service and click Create bucket. Add a bucket name and region. By default, ACLs should be disabled. Public access should also be blocked.
In the Jamsocket Dashboard, input the bucket name in the S3 Integration form and click “Continue”.
Create an AWS Role for Jamsocket
In the AWS Console, navigate to IAM → Roles and click Create role.

- Select AWS account as the trusted entity type
- Under An AWS account, select Another AWS account
- Enter
017820687119as the Account ID - Check Require external ID
- Copy the External ID from the S3 integration form on the Jamsocket Dashboard
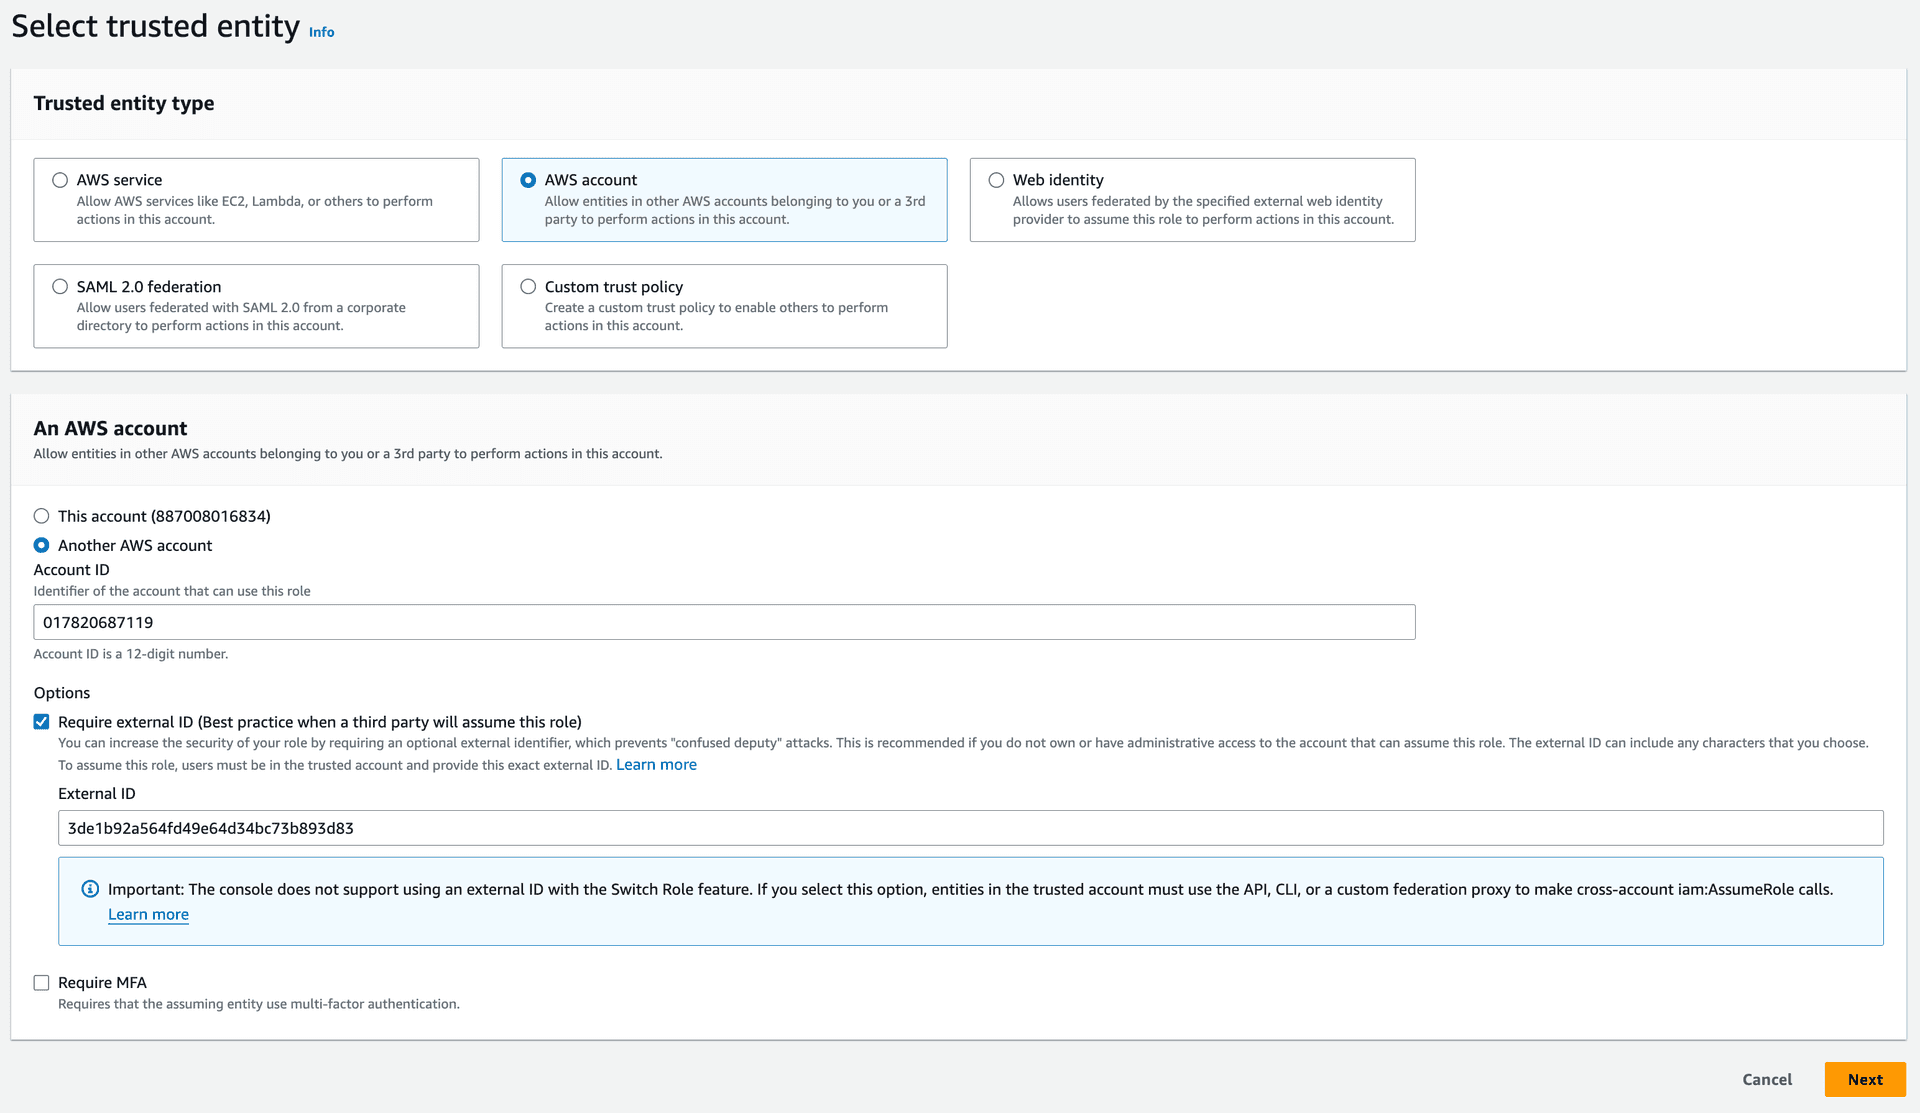
Click Next, skip adding permissions (we’ll do this later), and proceed to name your role (e.g., JamsocketAccess).
Once you’ve created your role, enter its ARN in the S3 integration form on the Jamsocket Dashboard and click “Continue”.
Increase Session Duration
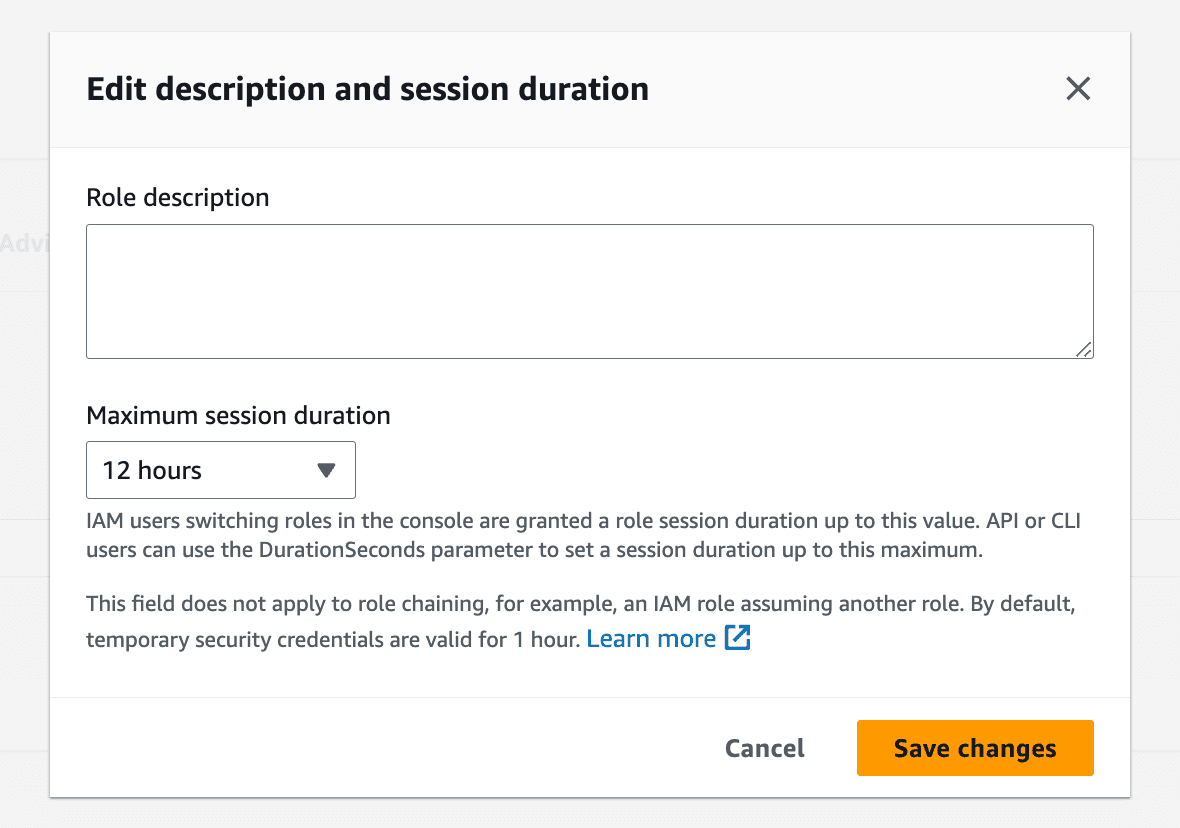
Still on the page for your new role, on the right of the Summary section, click Edit.
Set the maximum session duration to 12 hours and hit Save changes.
Back in the S3 integration form on the Jamsocket Dashboard, click “Continue”.
Attach S3 Permissions Policy
Find your newly-created role in IAM → Roles. Under Permissions policies, click Add permissions → Create inline policy.
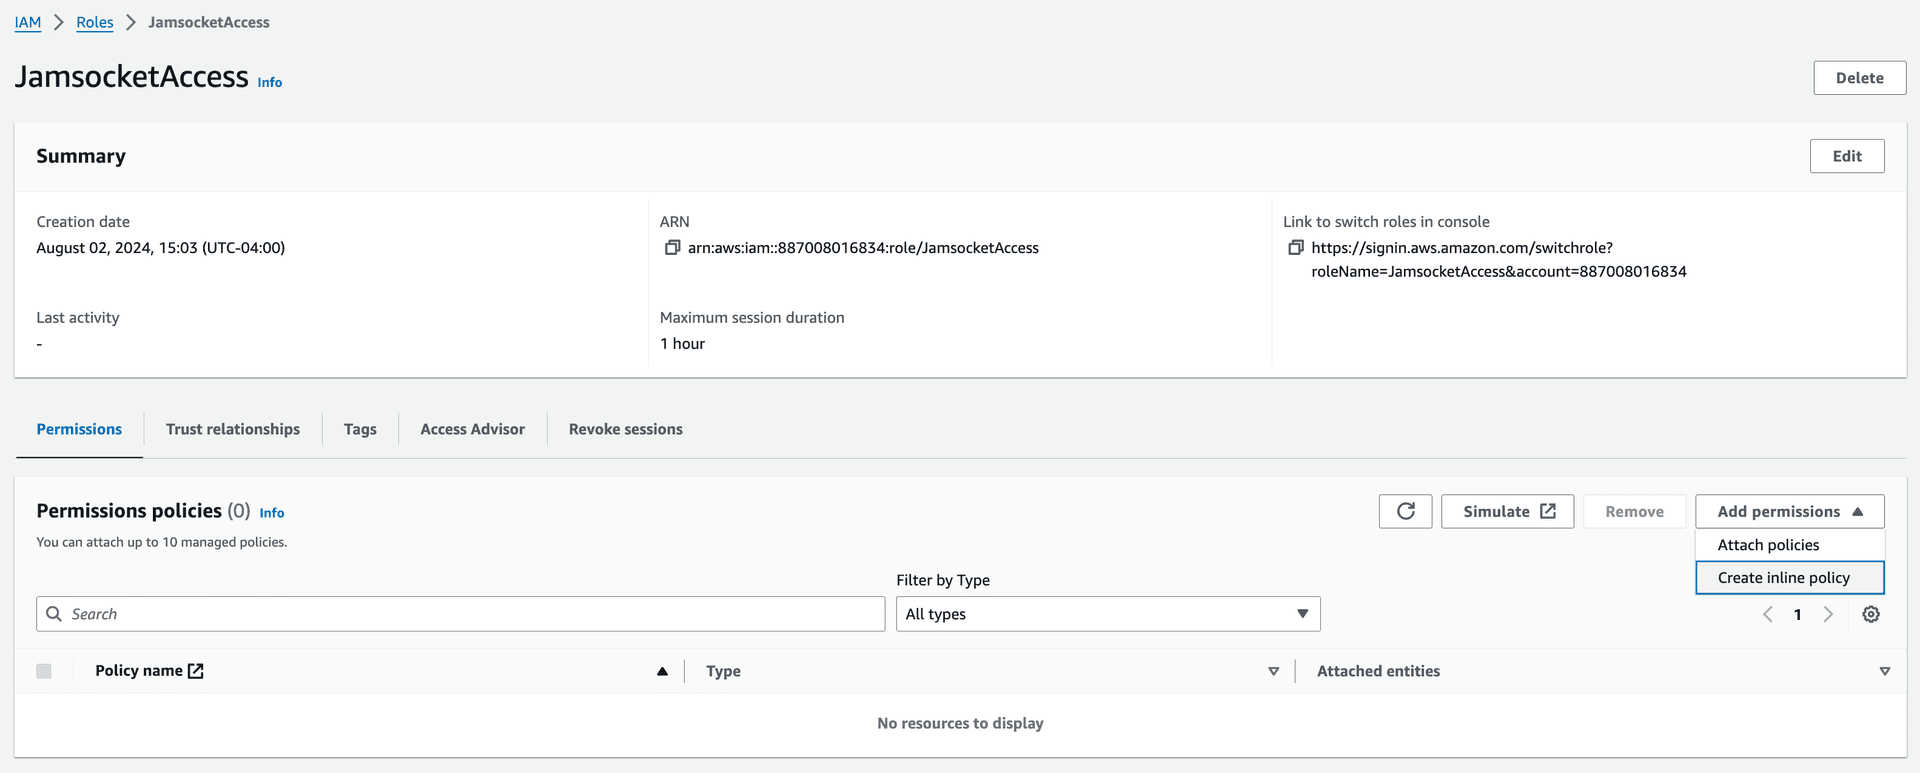
Switch to the JSON editor and paste the following policy:
Replace YOUR_BUCKET_HERE with your S3 bucket name. Make sure to keep the /* in the Resource paths.
{
    "Version": "2012-10-17",
    "Statement": [
        {
            "Effect": "Allow",
            "Action": [
                "s3:PutObject",
                "s3:GetObject",
                "s3:DeleteObject",
                "s3:GetBucketLocation",
                "s3:ListBucket"
            ],
            "Resource": [
                "arn:aws:s3:::YOUR_BUCKET_HERE/*",
                "arn:aws:s3:::YOUR_BUCKET_HERE"
            ]
        }
    ]
}
In the S3 integration form on the Jamsocket Dashboard, click “Finish”.
You’re all set! Your Y-Sweet service is now connected to your S3 bucket. When you create a new Y-Sweet document, you will see it appear in your S3 bucket.
If you encounter any issues during setup, please contact us or join our Discord for support.