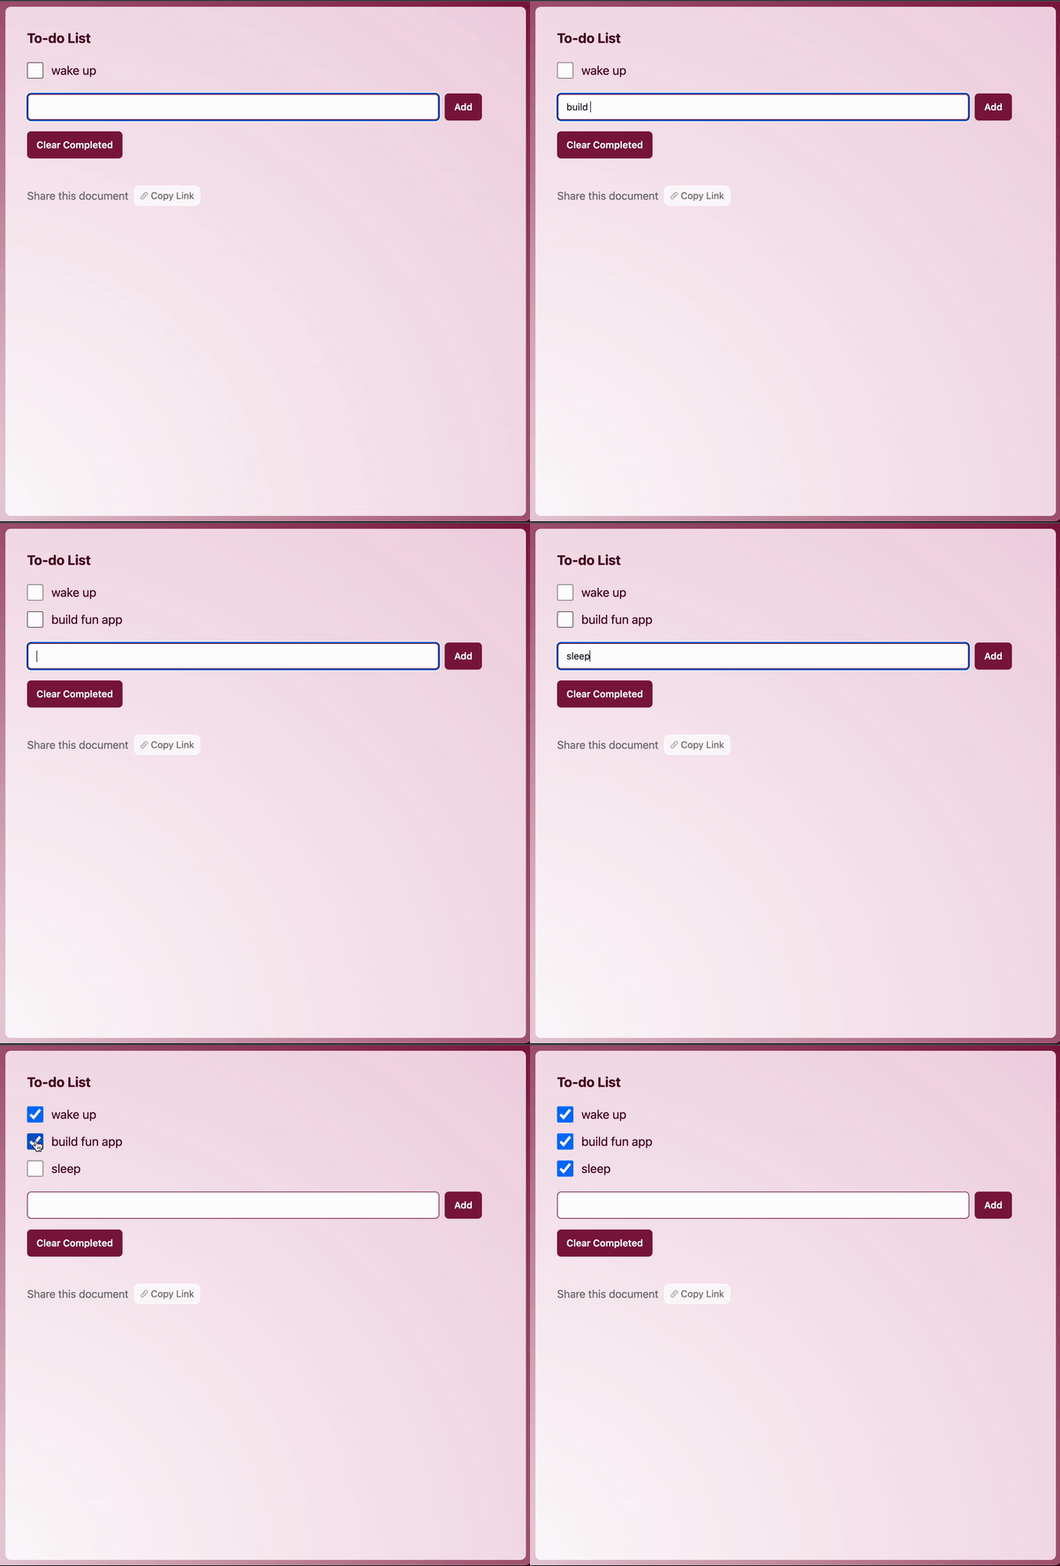
Making a collaborative To-Do List
Create and edit items in a collaborative to-do list. As users edit the list, changes will be automatically persisted and synced in real-time across clients.

Getting Started
Create a NextJS app and install y-sweet.
npx create-next-app@latest todolist --ts --tailwind
cd todolist
npm install @y-sweet/sdk @y-sweet/react
Run your app
npm run devEnable state synchronization and persistence
Get a connection string
If you haven’t already, create a Y-Sweet service in the Jamsocket dashboard, go to its page, and click “New connection string”. Give it a description and click “Create”, and copy the connection string. This is a secret key that your app will use to create docs and generate client tokens which give clients the ability to read and write y-sweet documents.
getOrCreateDocAndToken
Replace the contents of src/page.tsx with the following. Pass your connection string key to getOrCreateDocAndToken. Change the definition of CONNECTION_STRING to include your personal connection string.
This connection string is then passed to YDocProvider, which creates a client-side websocket connection. This is how the client speaks to the y-sweet server. In this example, the getClientToken function is a React Server Action, as denoted by the 'use server' directive, which means this function will be executed on the server. In a production application, you will need to perform an auth check at the top of this function just as you would for any API endpoint.
import { getOrCreateDocAndToken } from '@y-sweet/sdk'
import { YDocProvider } from '@y-sweet/react'
import { randomId } from '@/lib/utils'
import { ToDoList } from './ToDoList'

// *****************************************************
// ** TODO: Replace this with your connection string **
// *****************************************************
// For simplicity, we are hard-coding the connection string in the
// file. In a real app, you should instead pass this in through a
// secret store or environment variable.
const CONNECTION_STRING = "[paste your connection string]"

export default function Home({ searchParams }: { searchParams: { doc: string } }) {
  const docId = searchParams.doc ?? randomId()
  async function getClientToken() {
    'use server'
    // In a production application, you'd want to authenticate the user and
    // check that they have access to the given doc.
    return await getOrCreateDocAndToken(CONNECTION_STRING, docId)
  }
  return (
    <YDocProvider docId={docId} setQueryParam="doc" authEndpoint={getClientToken}>
      <ToDoList />
    </YDocProvider>
  )
}
Note that you’ll see errors when you run this code, because we haven’t defined ToDoList. We’ll do that in the next section.
The To-Do List
Create a ToDoList component
In a new file called ToDoList.tsx, create your to-do list component.
Note that useArray returns a Y.Array, which is like a JavaScript array that is automatically synchronized across clients.
'use client'

import { useArray } from '@y-sweet/react'
import * as Y from 'yjs'

export function ToDoList() {
  // Initialize our To-Do List as an array.
  // `useArray` returns a Y.Array and also subscribes to changes,
  // so that ToDoList is rerendered when the array changes.
  const items = useArray<Y.Map<any>>('todolist')

  return (
    <div className="m-10">
        <div>To-Do List</div>
        <div className="space-y-1">
            {/* This line of code won't work yet, but we'll make a ToDoItem
                in the next section  */}
            {items && items.map((item, index) => <ToDoItem key={index} item={item} />)}
        </div>
    </div>
  )
}
Render items with ToDoItem
In ToDoList, we map the array of items as a ToDoItem. Our ToDoItem component should do two things
- Render the to-do text as a changeable input
- Show a checkmark, which indicates whether the item has been completed
// Put this at the top, with your other imports.
import { useState } from 'react'

// Keep the ToDoList implementation from above.
// export function ToDoList() {
//     [...]
// }

type ToDoItemProps = {
  item: Y.Map<any>
}

export function ToDoItem({ item }: ToDoItemProps) {
  // Yjs has documentation for how to use its shared data types:
  // https://docs.yjs.dev/api/shared-types/y.map
  // For Y.Map, we can get and set values like so:
  const onCompleted = () => {
    item.set('done', !item.get('done'))
  }

  return (
    <div>
      <label className="flex flex-row space-x-2 items-center">
        <input
          type="checkbox"
          className="w-6 h-6 cursor-pointer"
          checked={item.get('done')}
          onChange={onCompleted}
        />
        <input
          className="bg-transparent p-1 rounded text-lg"
          value={item.get('text')}
          onChange={(e) => item.set('text', e.target.value)}
        />
      </label>
    </div>
  )
}
Adding items to your To-Do List
In ToDoItems, we’ll create a function that pushes a new item to the list of to-do items. Then we’ll pass that function to a a component we’ll create called ToDoInput.
'use client'

import { useArray } from '@y-sweet/react'
import * as Y from 'yjs'

export function ToDoList() {
  const items = useArray<Y.Map<any>>('todolist')

  const pushItem = (text: string) => {
      let item = new Y.Map([
        ['text', text],
        ['done', false],
      ] as [string, any][])

      items?.push([item])
  }

  return (
    <div className="space-y-1">
        {toDoItems && toDoItems.map((item, index) => <ToDoItem key={index} item={item} />)}
        {/* This line of code won't work yet, but we'll make a ToDoInput in the next section. */}
        <ToDoInput onCreateItem={pushItem} />
    </div>
  )
}
Create the ToDoInput component
In ToDoInput, we’ll create a form with a text input and a button. When the form is submitted, we’ll create a new item by calling props.onCreateItem.
export function ToDoInput(props: { onCreateItem: (text: string) => void }) {
  const [text, setText] = useState('')

  const onSubmit = (e: React.FormEvent) => {
      e.preventDefault()
      props.onCreateItem(text)
      setText('')
    }

  return (
    <form onSubmit={onSubmit} className="flex flex-row space-x-2 max-w-2xl">
        <input
          type="text"
          value={text}
          onChange={(e) => setText(e.target.value)}
          className="flex-1 block ring-black rounded-md border-0 px-3.5 py-2 text-gray-900 ring-1 ring-inset placeholder:text-gray-400"
        />
        <button
          type="submit"
          className="block rounded-md bg-blue-600 px-3.5 py-2.5 text-center text-sm hover:bg-blue-500"
        >
          Add
        </button>
    </form>
  )
}
Clear completed items
Your app is now be in a runnable state - if you’re feeling impatient, jump to the next section to try it out.
In the ToDoList component, we’ll add a button to clear completed items.
export function ToDoList() {
  ...

  const clearCompletedItems = () => {
    let indexOffset = 0
    items?.forEach((item, index) => {
      if (item.get('done')) {
        items.delete(index - indexOffset, 1)
        indexOffset += 1
      }
    })
  }

  return (
      <div className="space-y-1">
        // ...
        <button
            onClick={clearCompletedItems}
            className="block rounded-md bg-blue-600 px-3.5 py-2.5 text-center text-sm hover:bg-blue-500"
        >
            Clear Completed
        </button>
      </div>
  )
}
Run the app
We have enough here to test the to-do list.
Run npm run dev and navigate to localhost:3000 or whichever port you’re running on.
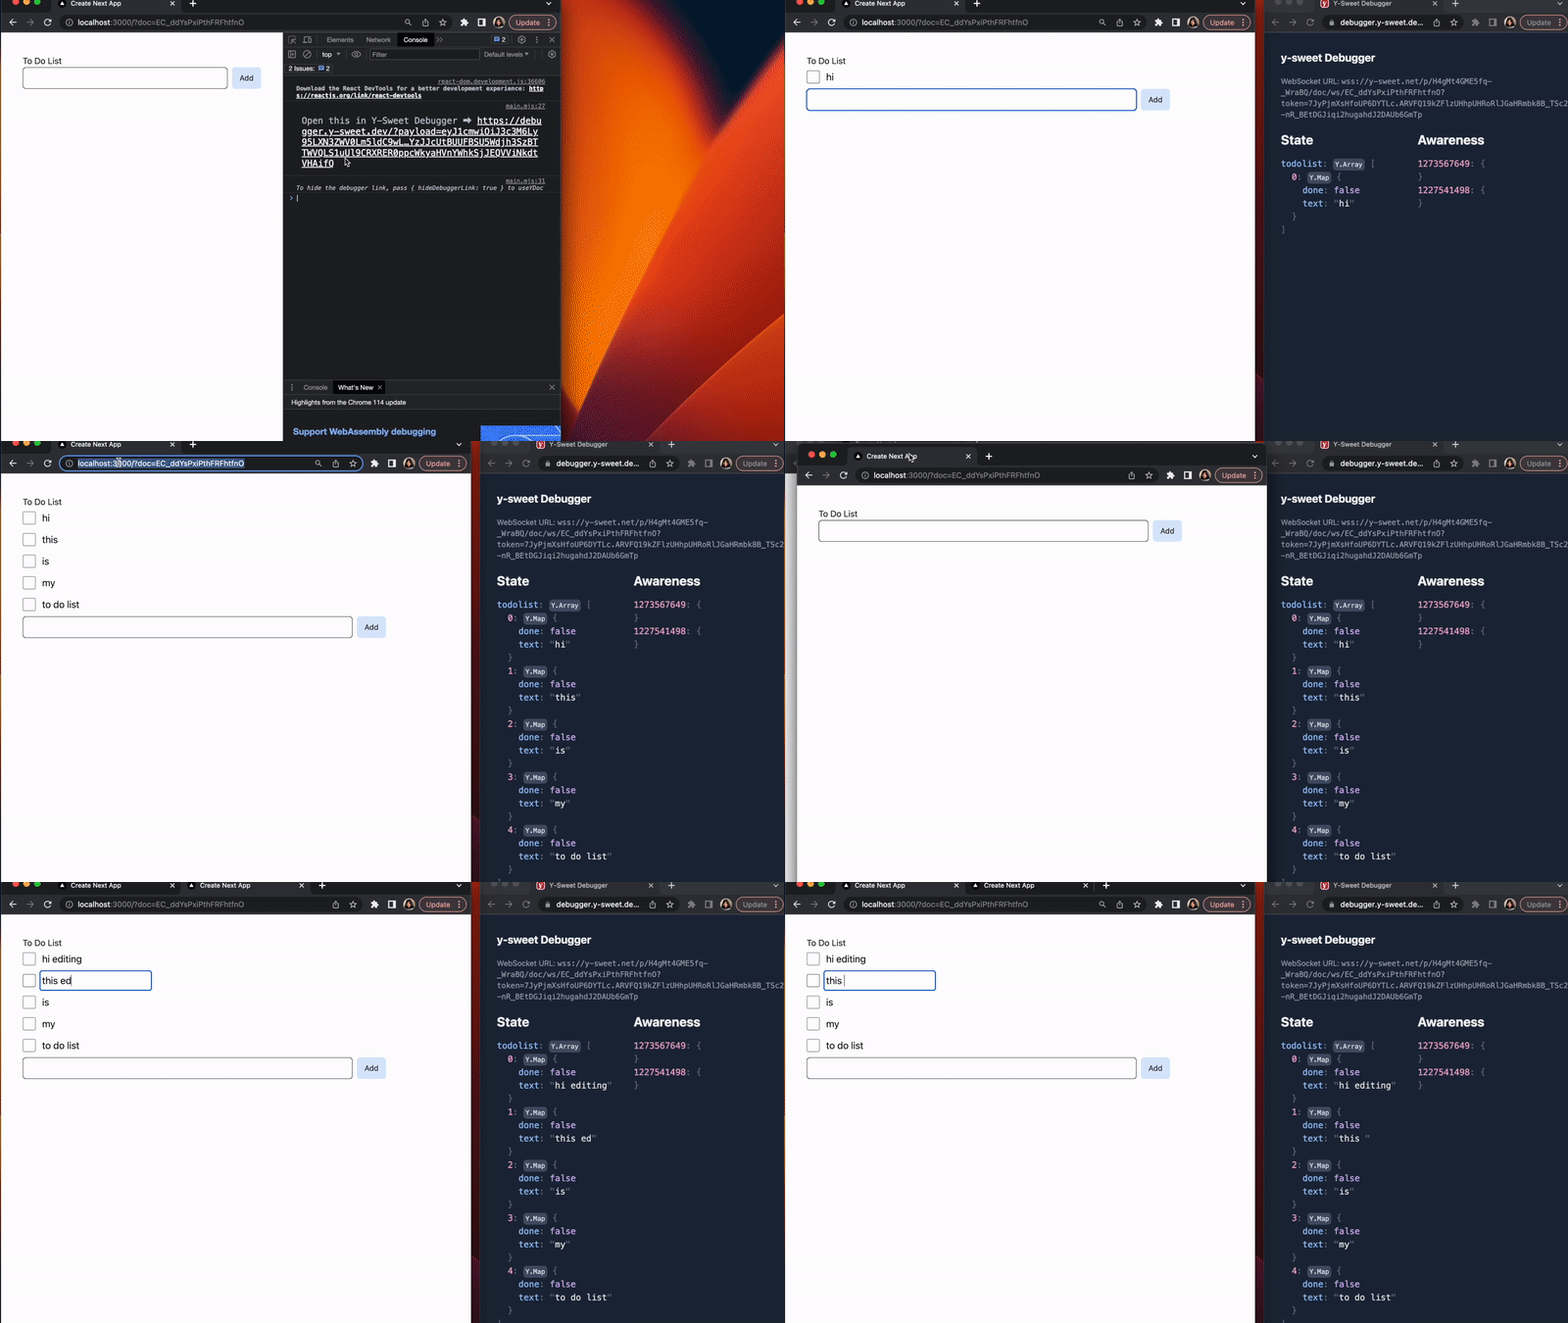
When you load the page, you’ll notice a doc appended to the url. This is a doc automatically created with getOrCreateDocAndToken. If this ID is supplied in the url, the same doc will appear. Otherwise, a new doc will be created.
To see multiplayer in action, copy the URL (including the ?doc=... part), and then open a new window and paste the URL. The to-do list will be synchronized across both windows in real time.
Using the debugger
In the developer tools, you’ll find a link to the Y-Sweet Debugger. You can use it to inspect the state of your app.

How to open developer tools:
Next Steps
Refer to our To-Do List demo
You can see all the code in action in our to-do list demo and style your To-Do List to match the cover image.