Making a block-based text editor with BlockNote
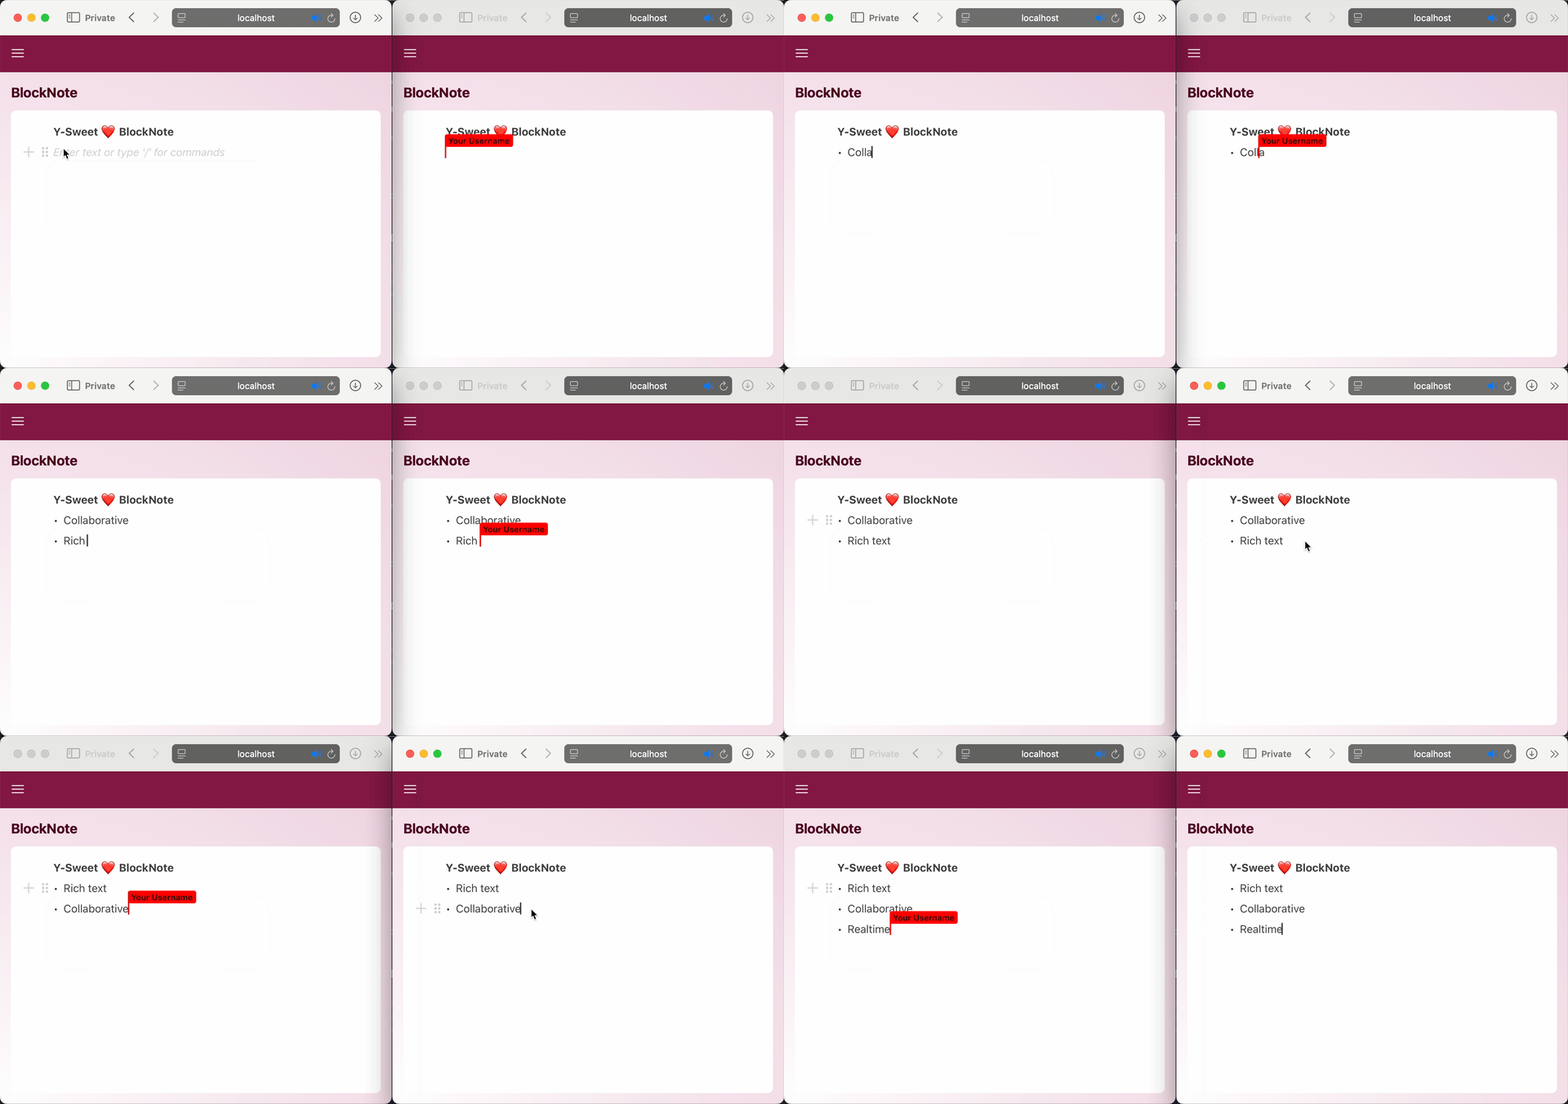
Create a Notion-like block-based text editor using the BlockNote library. As users edit the document, changes will automatically be persisted and synced in real time across clients.

Getting Started
Create a Y-Sweet app with create-y-sweet-app.
First, use the create-y-sweet-app command line tool to create a Y-Sweet app.
npx create-y-sweet-app@latest blocknoteYou’ll be presented with a wizard helping set up your project. Feel free to choose any framework you’d like; this tutorial will work with any of them! This tutorial will use the file structure from Next.js, but the actual code will be the same for all frameworks.
Once the dependencies have installed, enter your new project’s directory.
cd blocknoteRun your app
npm run devOpen http://localhost:3000 in your web browser. You already have a realtime collaborative app! Try opening the same page in another browser tab and interacting with it.
Setting up BlockNote
Install the BlockNote libraries
npm install --save @blocknote/core @blocknote/react @blocknote/mantineCreate the BlockNote editor
We’ll add the BlockNote editor to components/App.tsx. Replace the code in that file with the following:
"use client";

import { useCreateBlockNote } from "@blocknote/react";
import { BlockNoteView } from "@blocknote/mantine";
import "@blocknote/mantine/style.css";

export function App() {
  const editor = useCreateBlockNote();

  return <BlockNoteView editor={editor} />;
}
Let’s go through what’s happening line by line:
- BlockNote only works client-side, so we need to mark our
Appcomponent with"use client". - Import the BlockNote libraries.
- Create a new BlockNote editor instance with the React hook
useCreateBlockNote. - Render that editor instance with the
BlockNoteViewcomponent.
BlockNote has more information in their documentation.
Make it collaborative
Now that we have a working BlockNote editor, it’s time to make it collaborative. Luckily, BlockNote integrates seamlessly with Y-Sweet:
"use client";

import { useYDoc, useYjsProvider } from "@y-sweet/react";
import { useCreateBlockNote } from "@blocknote/react";
import { BlockNoteView } from "@blocknote/mantine";
import "@blocknote/mantine/style.css";

export function App() {
  const provider = useYjsProvider();
  const doc = useYDoc();

  const editor = useCreateBlockNote({
    collaboration: {
      provider,
      fragment: doc.getXmlFragment("blocknote"),
      user: { name: "Your Username", color: "#ff0000" },
    },
  });

  return <BlockNoteView editor={editor} />;
}
At a high level, we’re getting a Yjs document and provider from Y-Sweet and passing them to the BlockNote editor instance.
Again, let’s go through the changes line by line:
- Import the
useYDocanduseYjsProviderhooks from@y-sweet/react. - Set the Y-Sweet provider, a Yjs XML fragment type and the name and color of the local user in the BlockNote
collaborationoption.
Want to see what’s happening under the hood as you edit your document? In the developer console, you’ll find a link to the Y-Sweet Debugger. You can use it to inspect the state of your app.
Using multiple documents
Right now, there’s only ever one document shared by every user. In a real app, though, users probably want their own documents!
The Y-Sweet provider is set up in app/page.tsx. Right now, that file uses a hardcoded document ID. We’ll want to change that to accept a document ID from the query string, falling back to a random UUID if no query string is present:
import { DocumentManager } from "@y-sweet/sdk";
import { YDocProvider } from "@y-sweet/react";

import { App } from "@/components/App";

const manager = new DocumentManager(
  process.env.CONNECTION_STRING || "ys://127.0.0.1:8080",
);

export default function Home({ searchParams }: { searchParams: { doc: string } }) {
  const docId = searchParams.doc ?? crypto.randomUUID();

  async function getClientToken() {
    "use server";
    // In a production app, this is where you'd authenticate the user
    // and check that they are authorized to access the doc.
    return await manager.getOrCreateDocAndToken(docId);
  }

  return (
    <YDocProvider docId={docId} authEndpoint={getClientToken}>
      <App />
    </YDocProvider>
  );
}
Going live
You now have a collaborative editor using BlockNote! Any browser windows on your local computer can now edit the same document.
The last thing to do is make your app publicly available using Jamsocket’s Y-Sweet service. Y-Sweet will automatically persist all documents, either to Y-Sweet storage or your own S3 bucket.
Create a Y-Sweet service and generate a connection string
- If you haven’t already, sign up for Jamsocket and create a Y-Sweet service in the dashboard.
- Go to its page and click “New connection string”.
- Give it a description and click “Create”, and copy the connection string.
A connection string is a secret key that your app will use to create docs and generate client tokens which give clients the ability to read and write Y-Sweet documents.
Set the CONNECTION_STRING environment variable
Usually, the way you’d provide secrets to your app is using environment variables. In app/page.tsx, you can see that the DocumentManager uses the environment variable CONNECTION_STRING, falling back to a hardcoded local URL.
import { DocumentManager } from "@y-sweet/sdk";
import { YDocProvider } from "@y-sweet/react";

import { App } from "@/components/App";

const manager = new DocumentManager(
  process.env.CONNECTION_STRING || "ys://127.0.0.1:8080",
);

export default function Home({ searchParams }: { searchParams: { doc: string } }) {
  const docId = searchParams.doc ?? crypto.randomUUID();

  async function getClientToken() {
    "use server";
    // In a production app, this is where you'd authenticate the user
    // and check that they are authorized to access the doc.
    return await manager.getOrCreateDocAndToken(docId);
  }

  return (
    <YDocProvider docId={docId} authEndpoint={getClientToken}>
      <App />
    </YDocProvider>
  );
}
In a production environment, you can typically use your platform’s dashboard to set environment variables for your application.
If you’re deploying on Netlify, you can use our Netlify extension to get up and running quickly!
Deploy!
You’re ready to go! Once you deploy your project, you should have a working collaborative BlockNote editor using Y-Sweet.
If you run into any trouble, we have a Discord server where you can ask for help.